In an effort to improve my forensics skills I have been working through publicly available forensics CTFs when I have some free time.
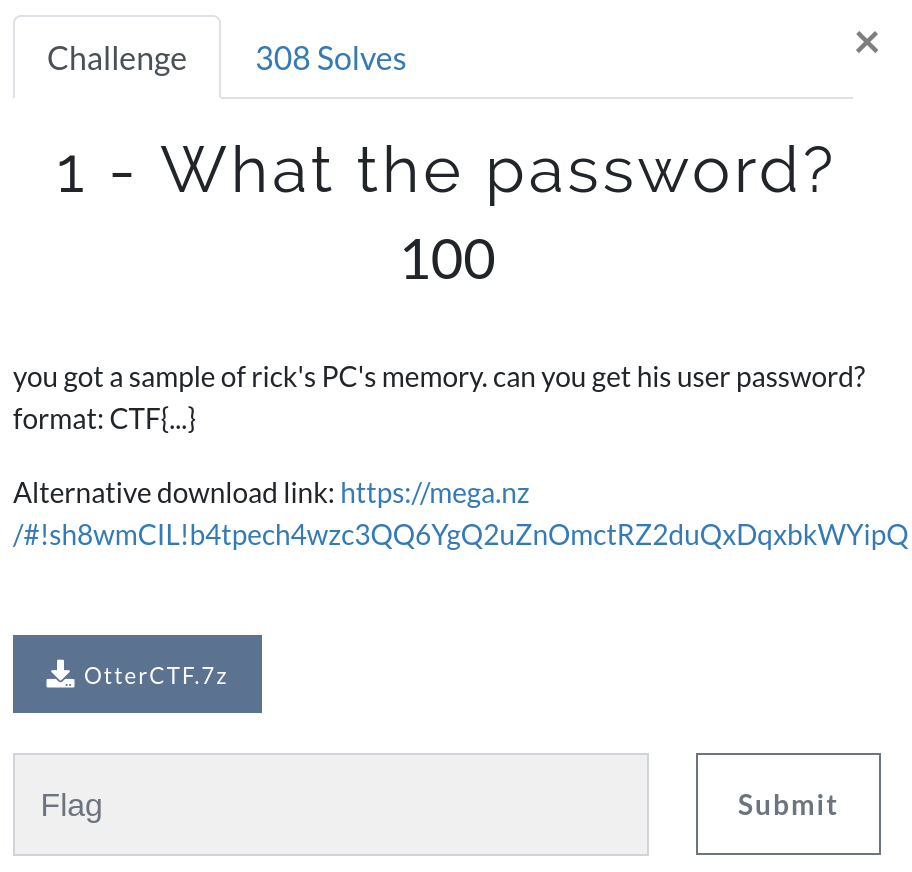
OtterCTF dates from December 2018 and includes reverse engineering, steganography, network traffic, and more traditional forensics challenges. This write-up only covers the memory forensics portion, but the whole CTF is available to play as of the publication of this post.
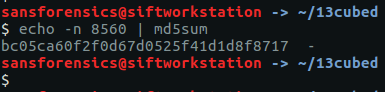
The first thing to do is download the memory image (OtterCTF.vmem). There weren’t any hashes published to check against, but I calculated the following:
MD5: ad51f4ada4151eab76f2dce8dea69868
SHA1: e6929ec61eb22af198186238bc916497e7c2b1d2
Let’s get on with it…
Question 1 – What the password?
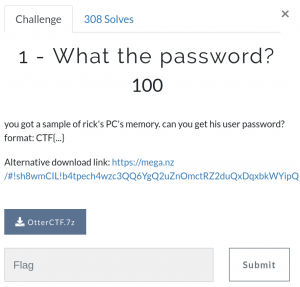
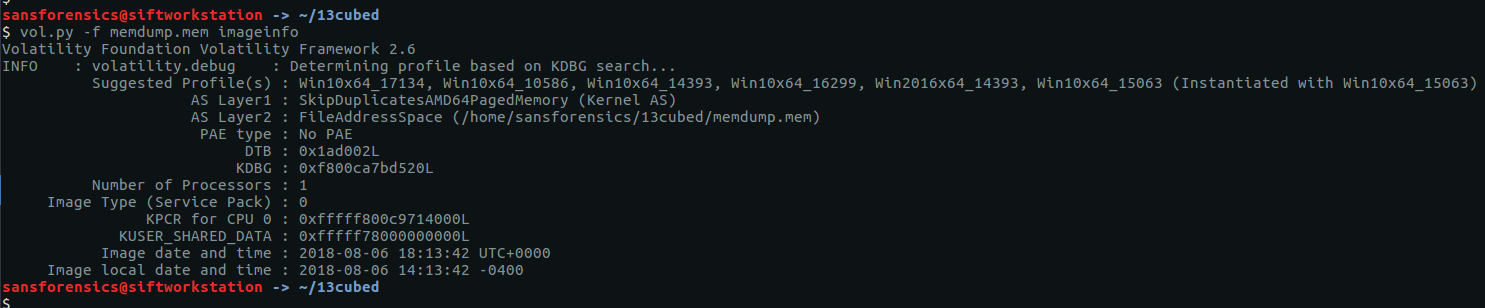
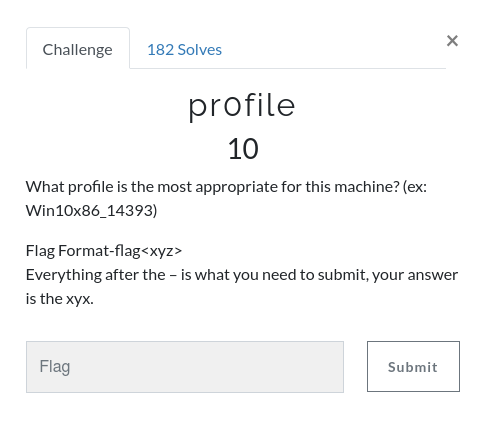
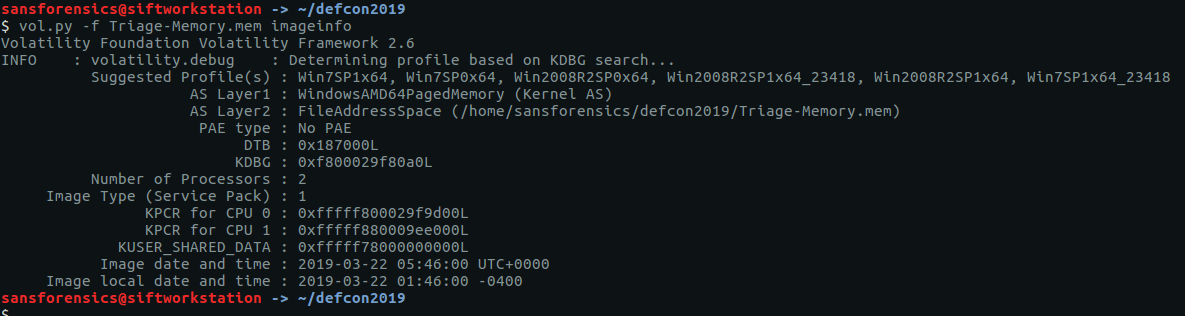
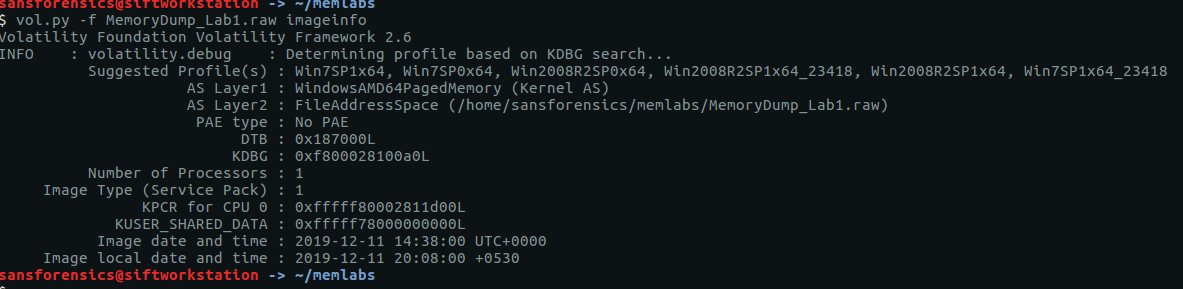
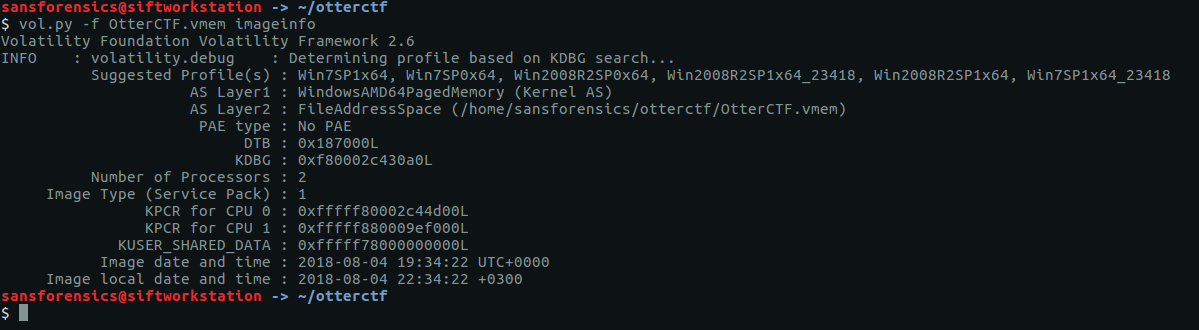
Before we can get started on analysis we need to tell Volatility what kind of memory image we are working with. The imageinfo plugin will scan the image and suggest a number of likely profiles.
vol.py -f OtterCTF.vmem imageinfo
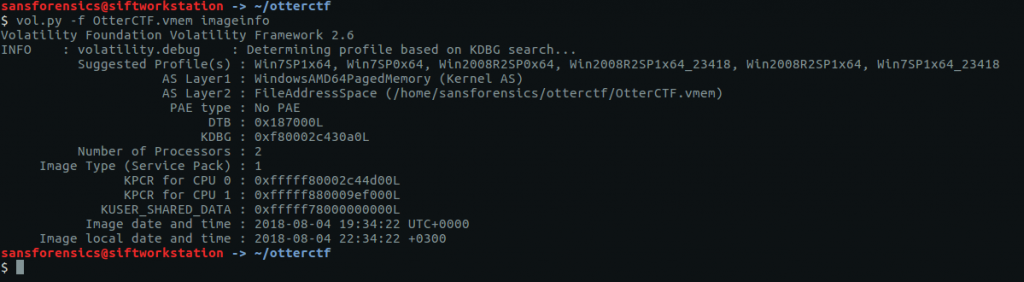
The Win7SP1x64 profile seems like a sensible choice for now (we can always revisit this later if we run into errors). Onto the analysis!
The hashdump plugin will, unsurprisingly, dump the NTLM hashes from the SYSTEM and SAM registry hives.
vol.py -f OtterCTF.vmem --profile="Win7SP1x64" hashdump

The question asks for the user password, not the password hash, so we can either try to crack this using tools like John the Ripper or Hashcat (or Google), or we can try extracting the plaintext password from the LSA secrets using the lsadump plugin.
vol.py -f OtterCTF.vmem --profile="Win7SP1x64" lsadump
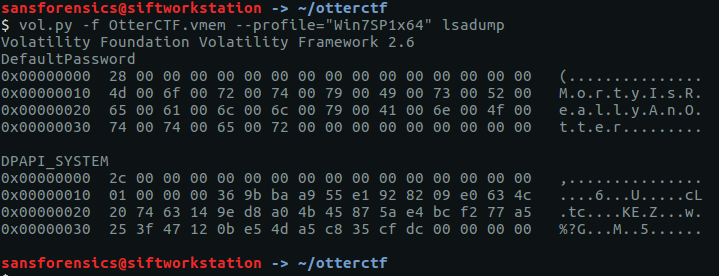
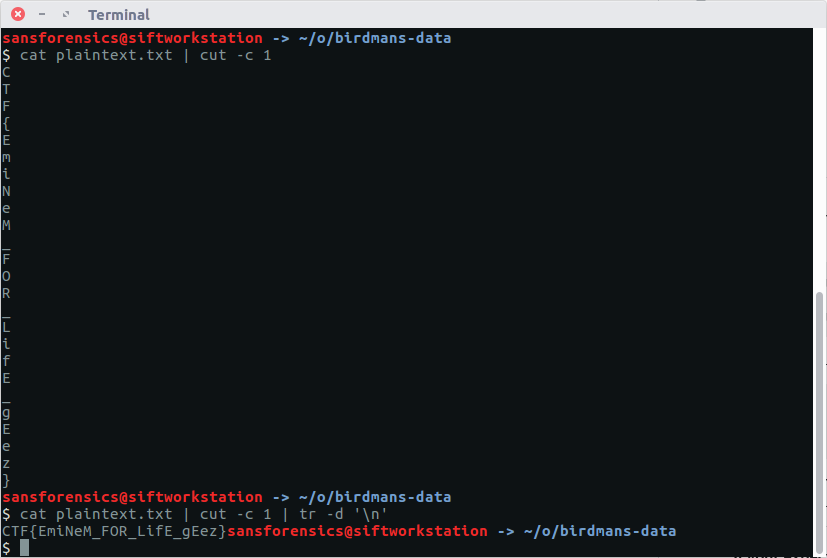
And we have our first flag:
CTF{MortyIsReallyAnOtter}
Question 2 – General Info
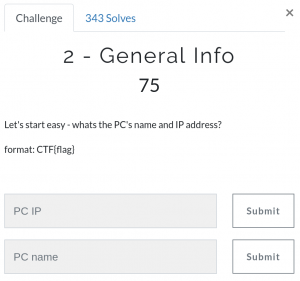
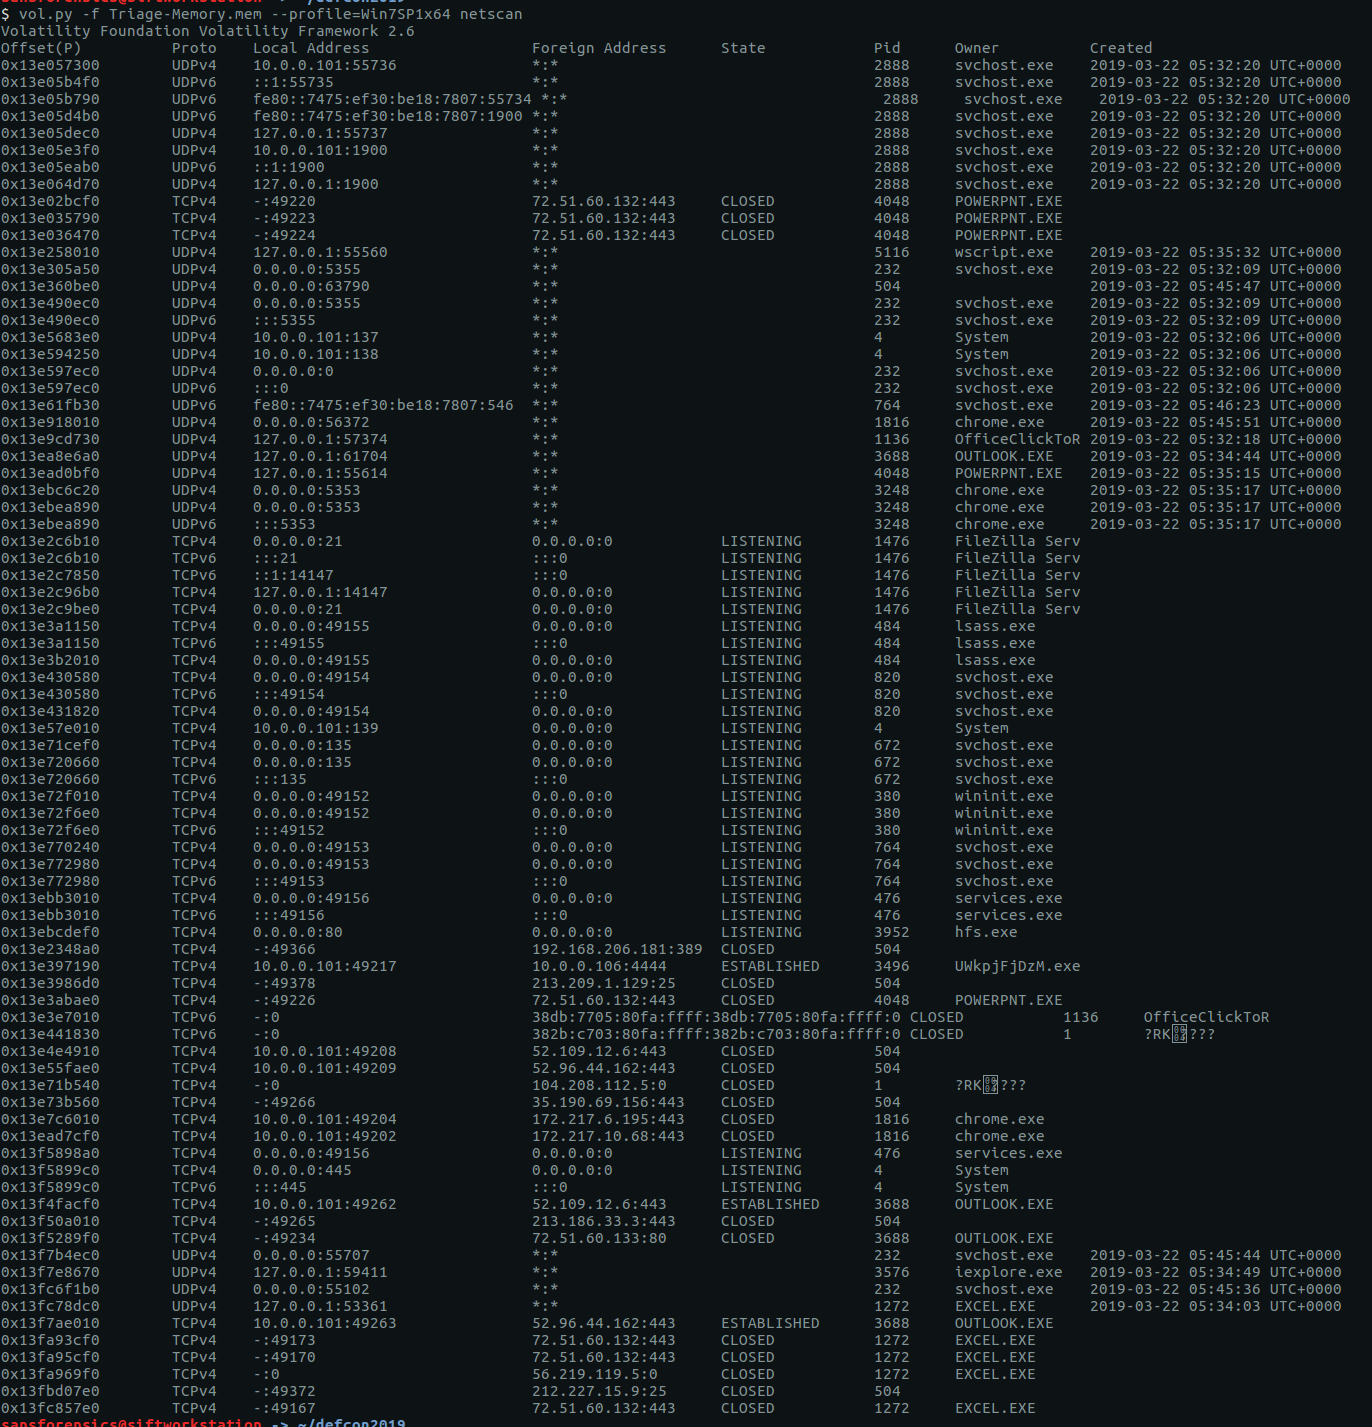
We need to find the IP address and hostname of Rick’s machine. The netscan plugin will give us the network data we need.
vol.py -f OtterCTF.vmem --profile="Win7SP1x64" netscan

We can rule out 0.0.0.0 and 127.0.0.1, leaving us with 192.168.202.131
CTF{192.168.202.131}
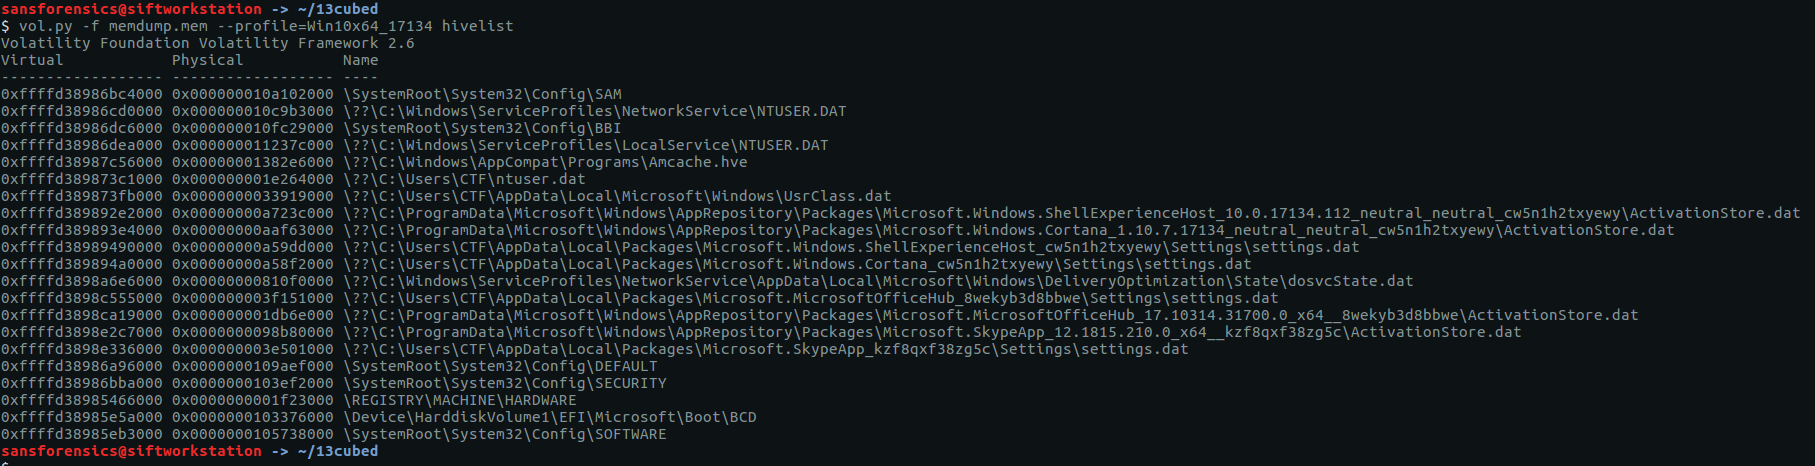
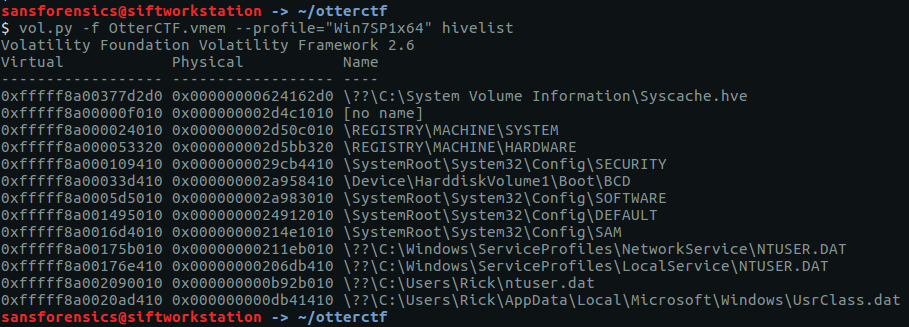
The hostname is stored in the SYSTEM registry hive. Before we can query the hive we need to find the offset.
vol.py -f OtterCTF.vmem --profile="Win7SP1x64" hivelist
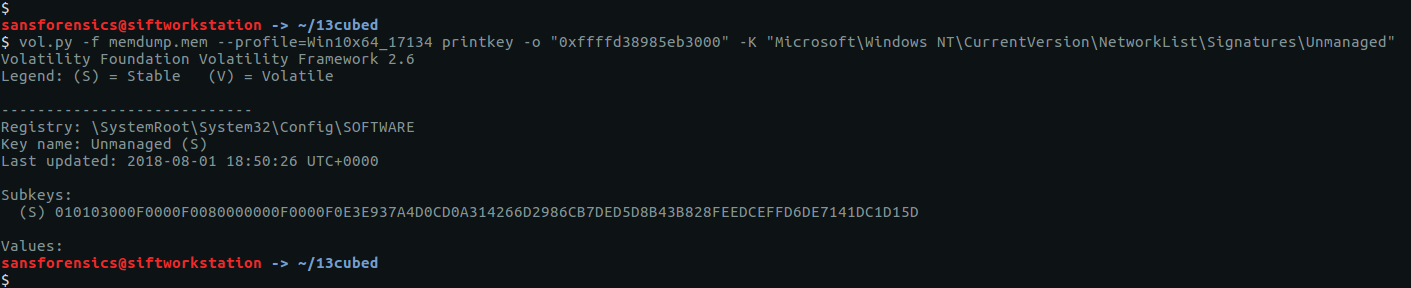
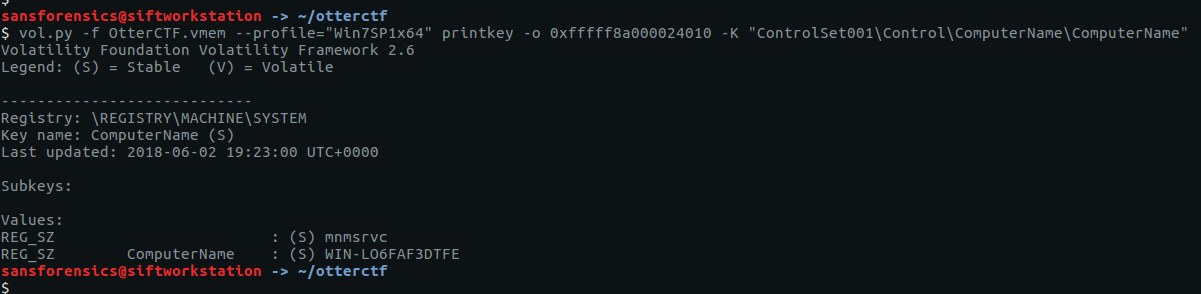
Supplying the printkey plugin with the offset and the name of the relevant registry key gives us the second flag for this question.
vol.py -f OtterCTF.vmem --profile="Win7SP1x64" printkey -o 0xfffff8a000024010 -K "ControlSet001\Control\ComputerName\ComputerName"
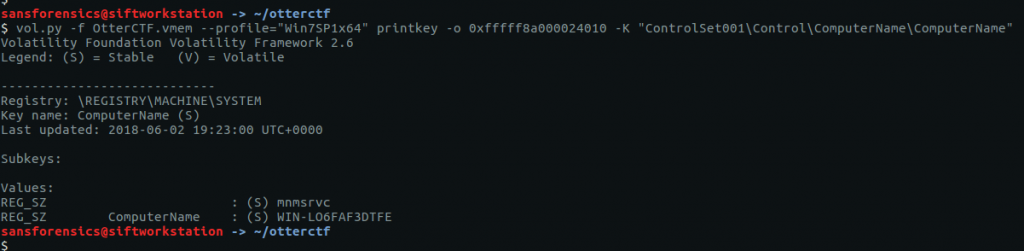
CTF{WIN-LO6FAF3DTFE}
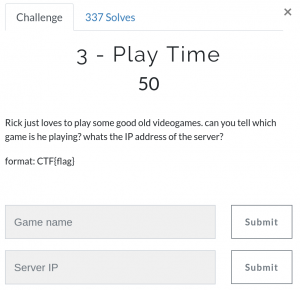
Question 3 – Play Time
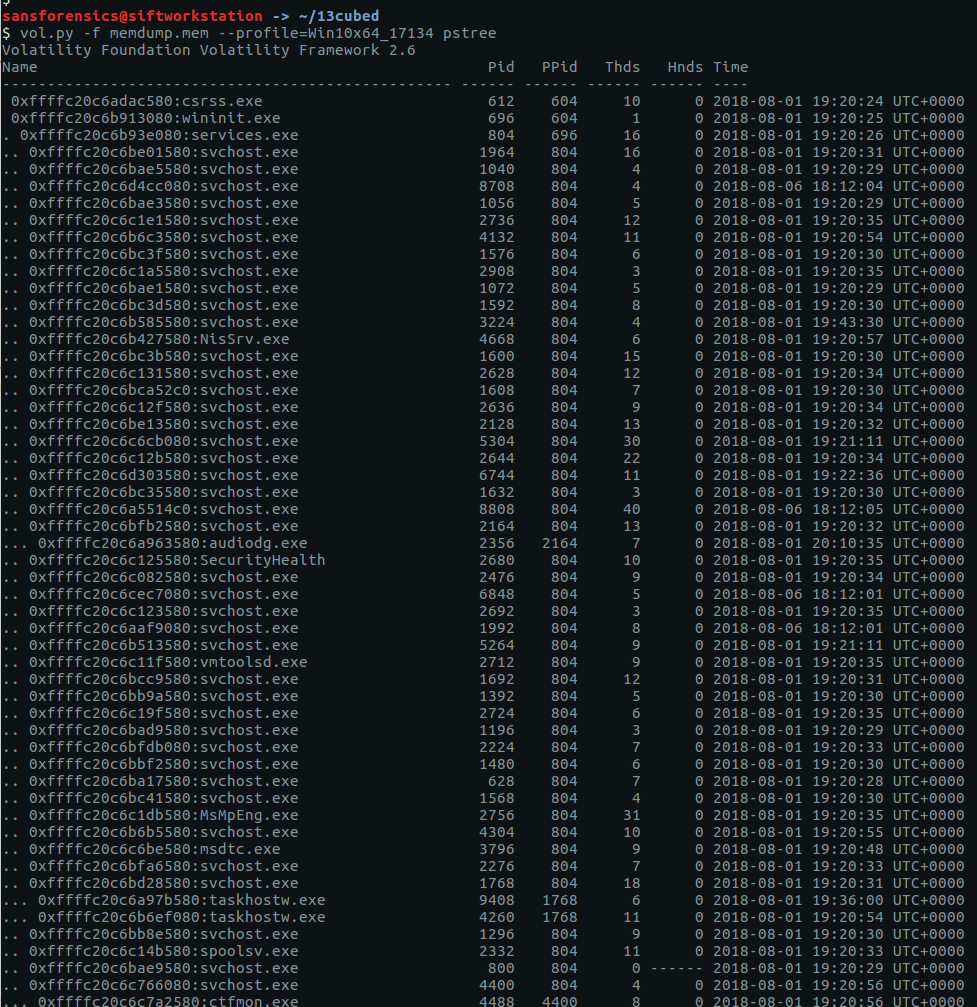
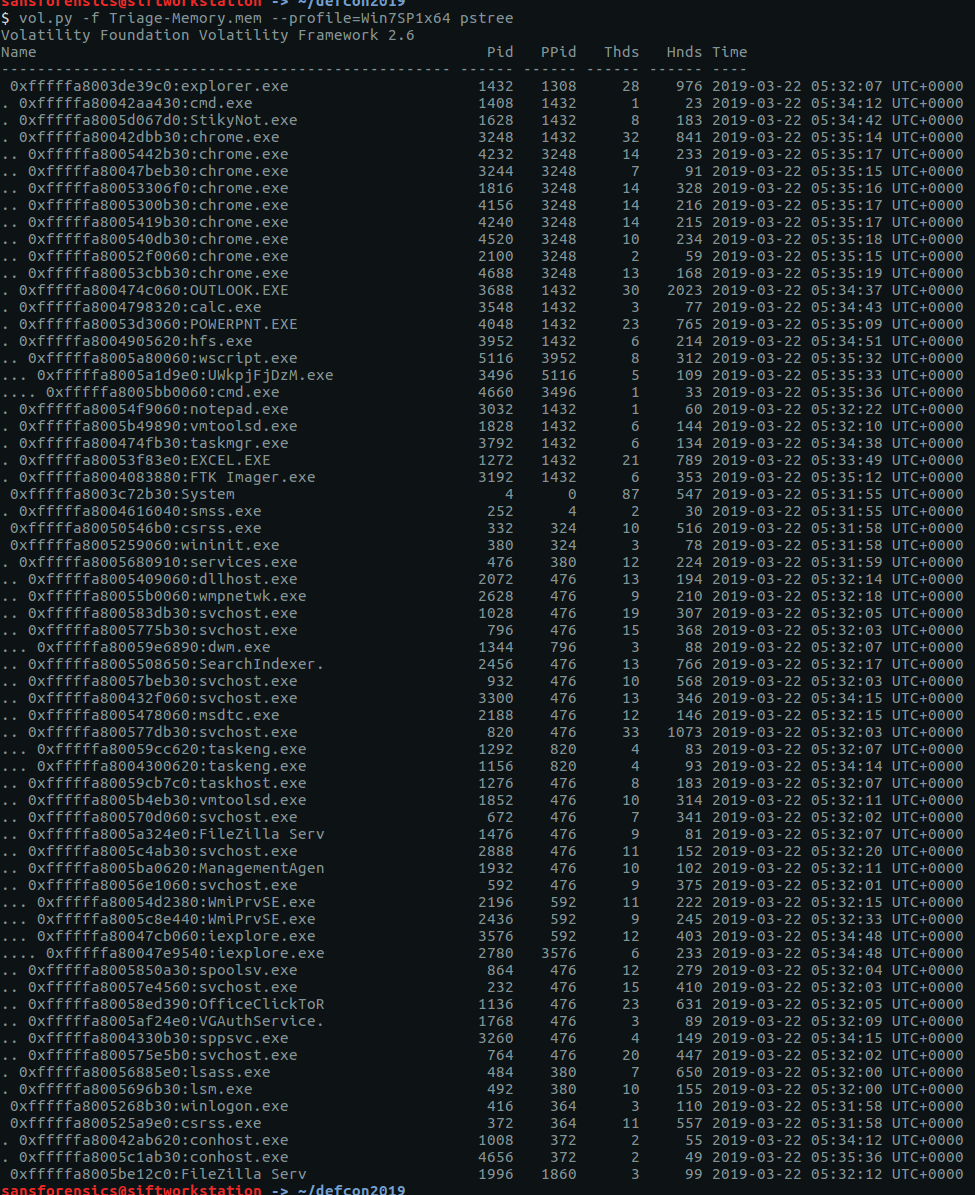
The pstree plugin gives us a nice view of running processes.
vol.py -f OtterCTF.vmem --profile="Win7SP1x64" pstree
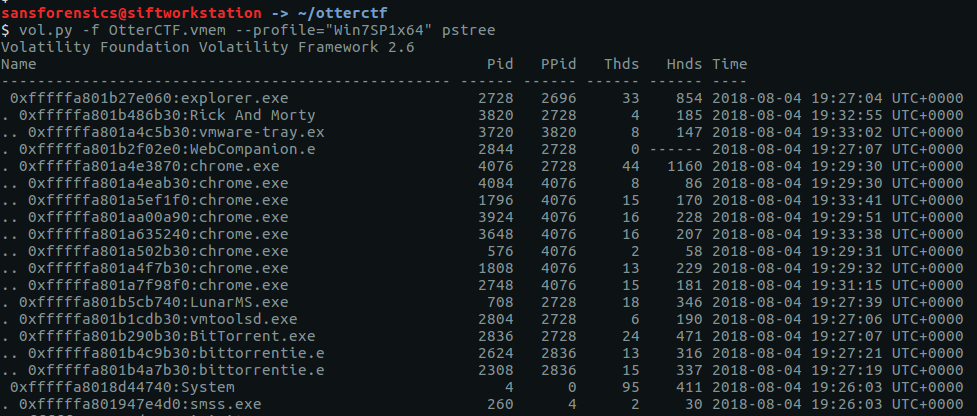
Google tells me that LunarMS is associated with an old MMORPG, so there’s the first part of our answer.
CTF{LunarMS}
Finding the IP of the server is simply a matter of running the netscan plugin and using grep to filter on the LunarMS process.
vol.py -f OtterCTF.vmem --profile="Win7SP1x64" netscan | grep "LunarMS"

CTF{77.102.199.102}
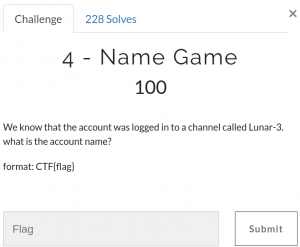
Question 4 – Name Game
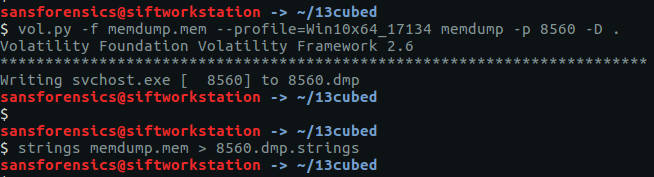
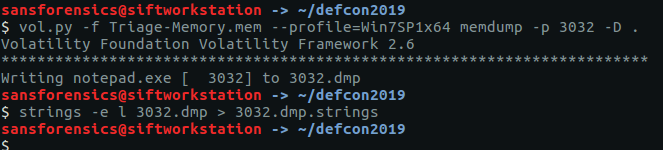
The account name will be somewhere in the process memory; let’s dump that out to make the next step a bit easier. We know the PID of the LunarMS process is 708, so pass that to the memdump plugin, then use strings and grep to filter the output. The -C 10 flag tells grep to return the 10 lines above and below the matching line.
vol.py -f OtterCTF.vmem --profile="Win7SP1x64" memdump -p 708 -D .
strings 708.dmp > 708.dmp.strings
grep -C 10 "Lunar-3" 708.dmp.strings
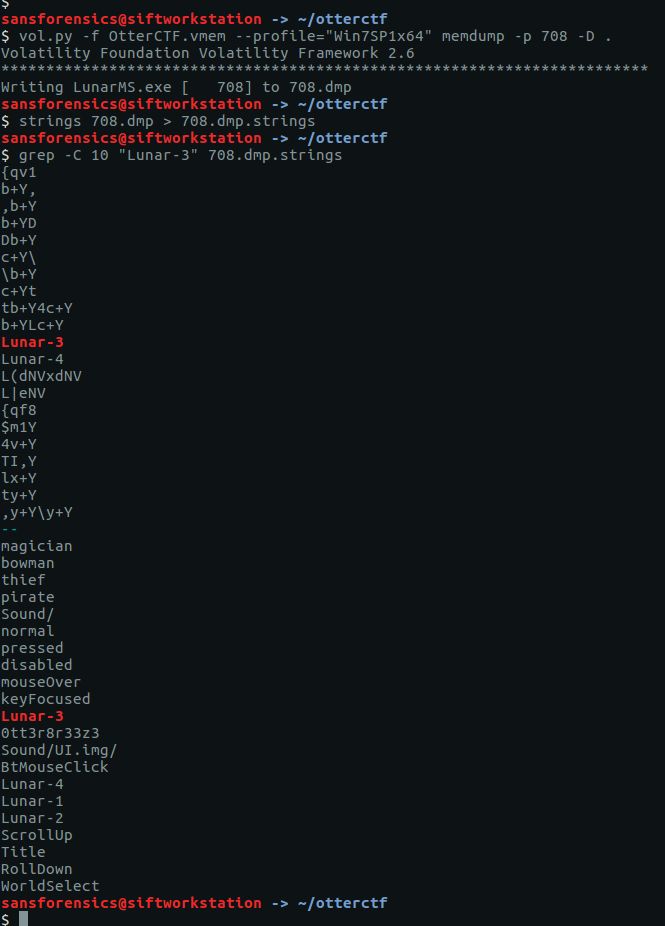
Given the previous references to otters in this CTF, one line stands out:
CTF{0tt3r8r33z3}
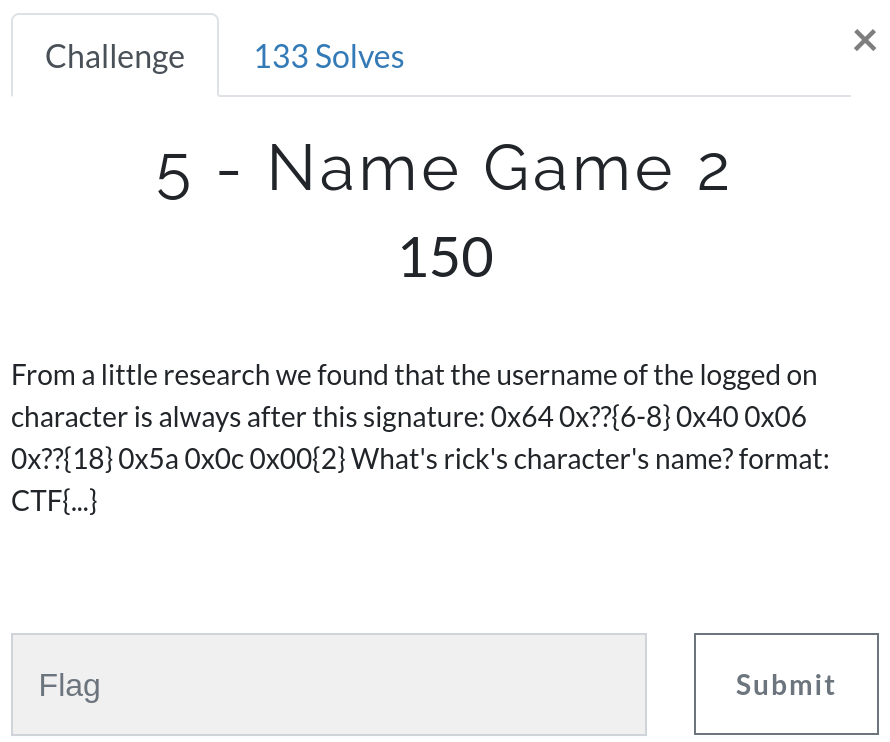
Question 5 – Name Game 2

We are given a sequence of bytes and told that the data we want will follow. We already have a dump of the LunarMS process memory from Question 4 so this is all about searching. For simplicity I only used the last eight bytes in the sequence in my search, employing xxd to display the bytes and grep to search for the end of our target pattern.
xxd 708.dmp | grep "5a0c 0000"
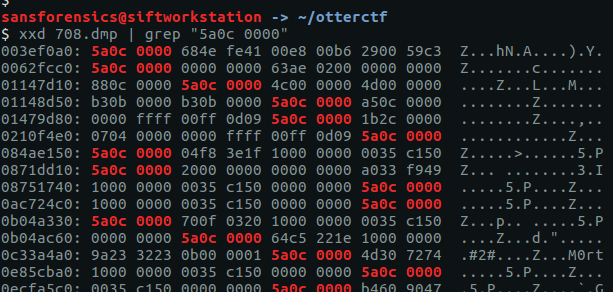
There is some human-readable text at 0x0c33a4ac so let’s use xxd again to give us the next 16 bytes of our process memory dump.

That looks like our flag.
CTF{M0rtyL0L}
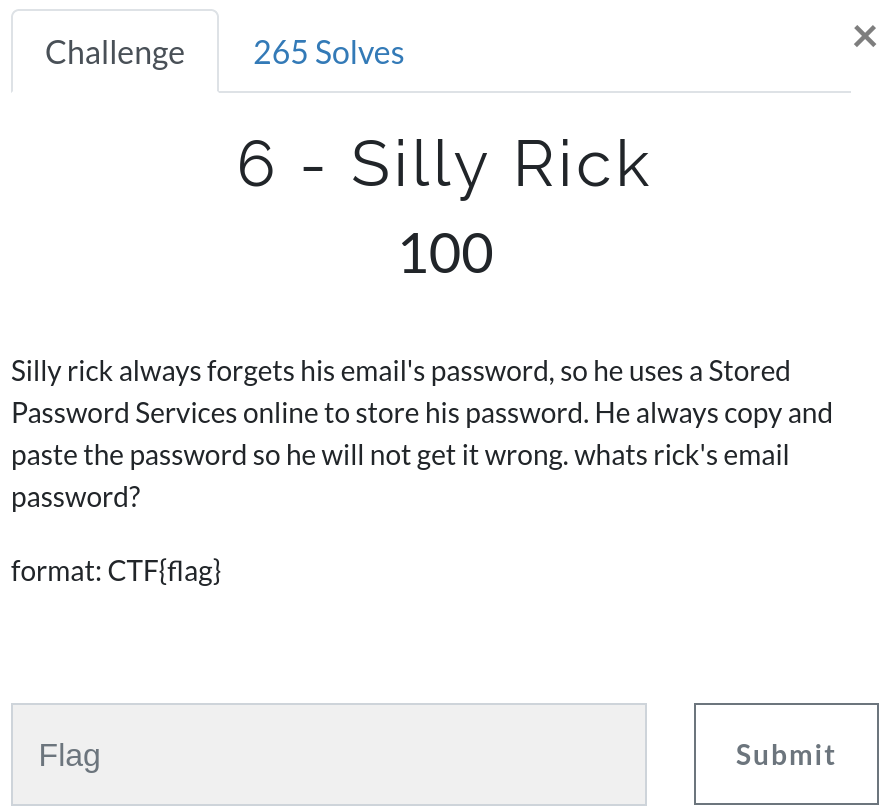
Question 6 – Silly Rick

We get a hint that Rick always copies and pastes his password, so the clipboard plugin is likely to give us what we need for this question.
vol.py -f OtterCTF.vmem --profile="Win7SP1x64" clipboard

And there we are – Rick’s email password.
CTF{M@il_Pr0vid0rs}
Question 7 – Hide and Seek
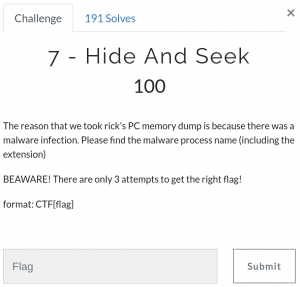
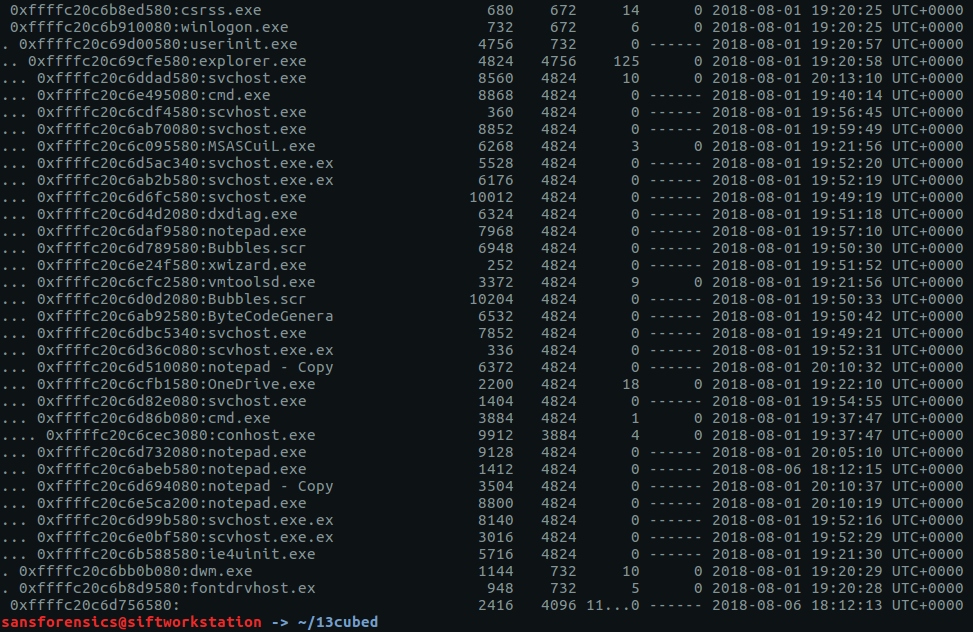
Listing the processes with pstree we can see one called Rick and Morty, with a child process called vmware-tray.ex – that’s unusual.
vol.py -f OtterCTF.vmem --profile="Win7SP1x64" pstree
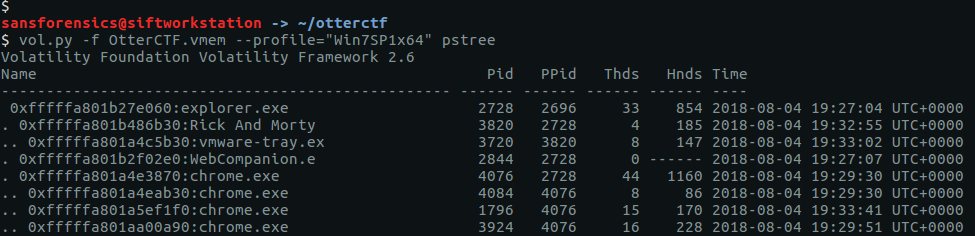
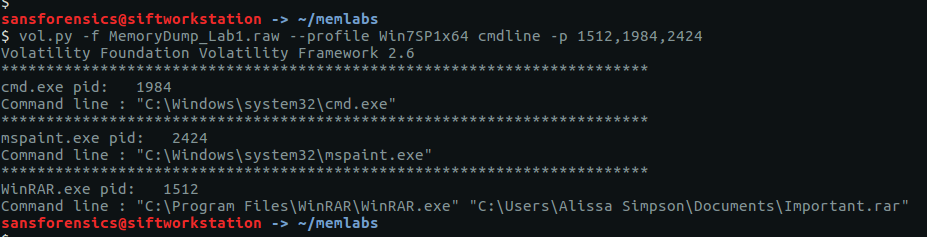
By supplying the PIDs to the cmdline plugin we can see the full command lines associated with both our unusual processes.
vol.py -f OtterCTF.vmem --profile="Win7SP1x64" cmdline -p 3820,3720
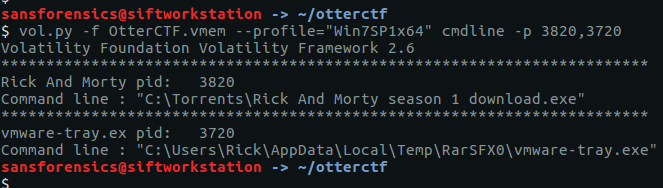
An executable running from the user’s AppData\Local\Temp directory is particularly odd. Submitting the name and extension of the executable gives us our flag.
CTF{vmware-tray.exe}
Question 8 – Path to Glory
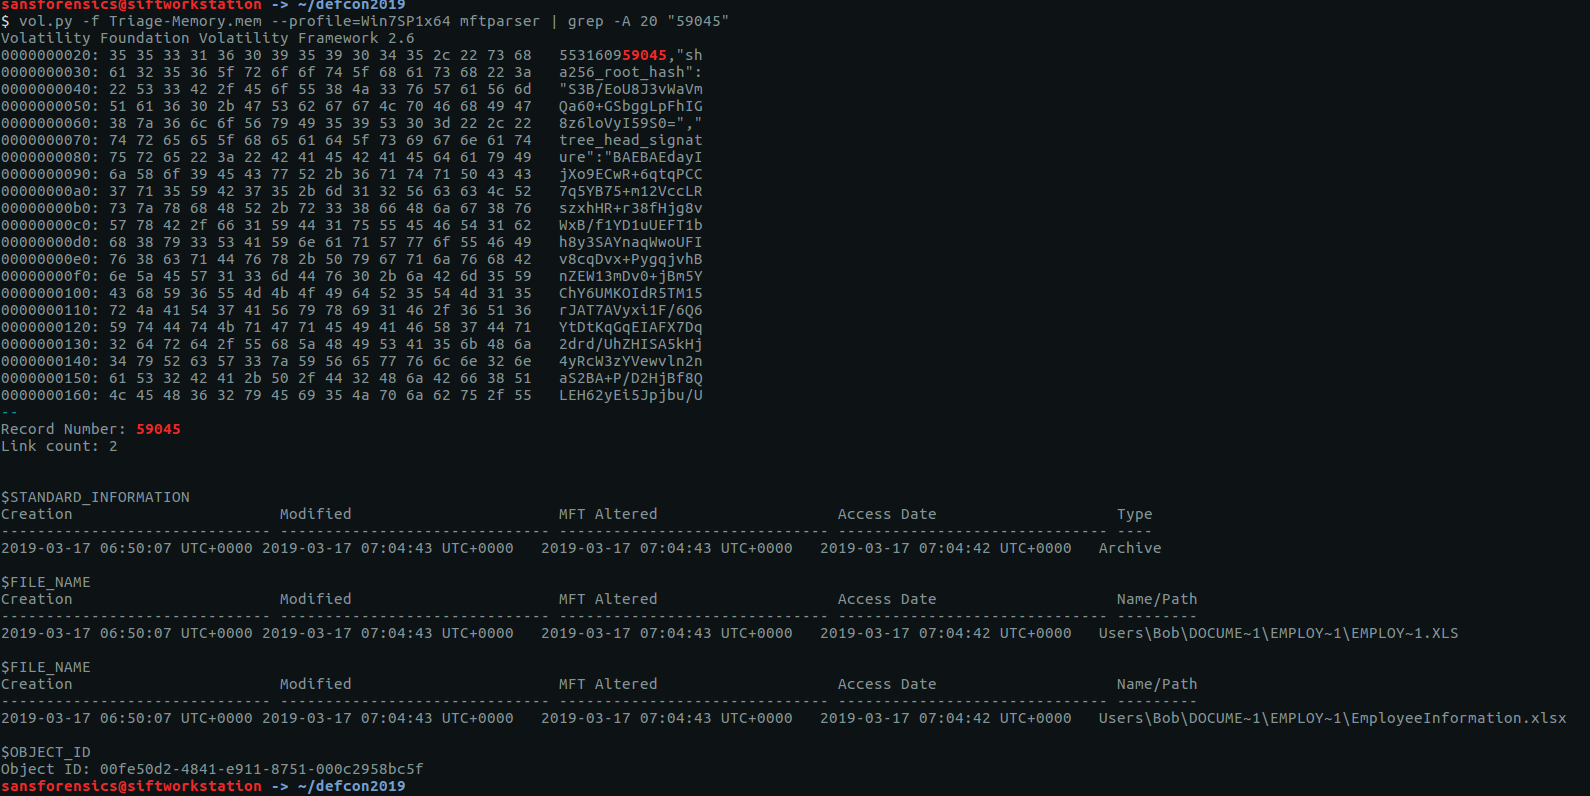
In Question 7 we found a file path suggesting that Bittorrent was involved; let’s go find the associated torrent file. Using the filescan plugin and filtering with grep gives us a few places to look.
vol.py -f OtterCTF.vmem --profile="Win7SP1x64" filescan | grep -i "rick and morty"

We can extract files from the memory image by passing the offset to the dumpfiles plugin.
vol.py -f OtterCTF.vmem --profile="Win7SP1x64" dumpfiles -Q 0x000000007d8813c0 -D .
cat file.None.0xfffffa801af10010.dat

Using the cat utility to display the contents of the file, we see that it is the Zone Identifier rather than the torrent itself. The line ZoneId=3 indicates that the torrent was downloaded from the internet – that might be useful for later. Let’s extract the next candidate for our torrent file.
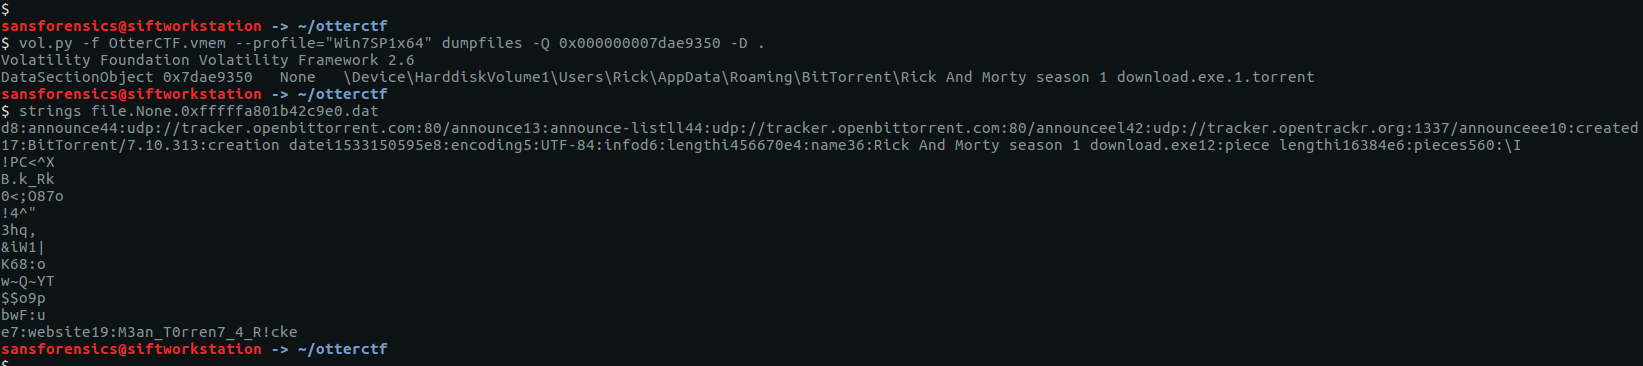
vol.py -f OtterCTF.vmem --profile="Win7SP1x64" dumpfiles -Q 0x000000007dae9350 -D .
strings file.None.0xfffffa801b42c9e0.dat

Running strings this time we can see the details of the torrent, including a comment on the final line that looks like our next flag.
CTF{M3an_T0rren7_4_R!ck}
Question 9 – Path to Glory 2
The Zone Identifier file we extracted by mistake in the last question indicates the torrent was downloaded from the internet. The number of chrome.exe processes observed in our pstree output suggests that Google Chrome is the primary browser. As with Question 8 we can use the filescan and dumpfiles plugins to find and extract the Chrome history database.
vol.py -f OtterCTF.vmem --profile="Win7SP1x64" filescan | grep -ie "history$"
vol.py -f OtterCTF.vmem --profile="Win7SP1x64" dumpfiles -Q 0x000000007d45dcc0 -D .

Chrome stores history data in a SQLite database. I renamed the file to chrome-history.sqlite, and used the sqlite3 utility to run the following query:
select current_path, site_url from downloads;
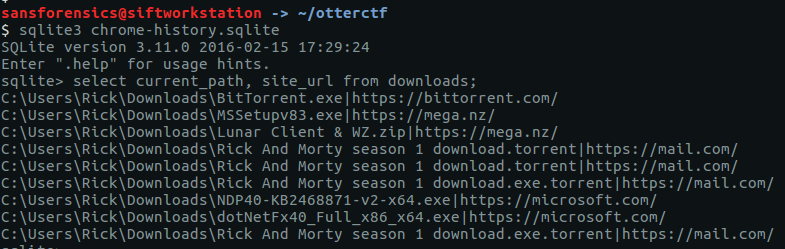
From the output of the database query we can see that the torrent file was downloaded from https://mail.com
Let’s dump the strings from our memory image and look for any artefacts related to mail.com
strings OtterCTF.vmem > OtterCTF.vmem.strings
grep "@mail.com" OtterCTF.vmem.strings
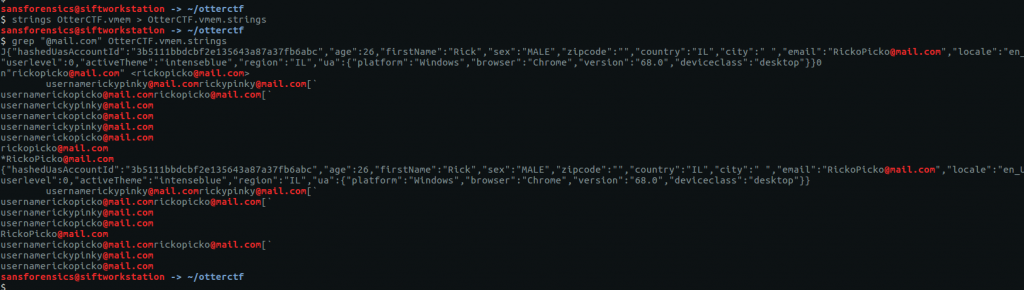
The second line of the grep output resembles the address field of an email header; perhaps some message content was still in memory when the image was made. Using grep with the -A 20 flag to show the 20 lines following Rick’s email address gives us the following:
grep -A 20 "<rickopicko@mail.com>" OtterCTF.vmem.strings
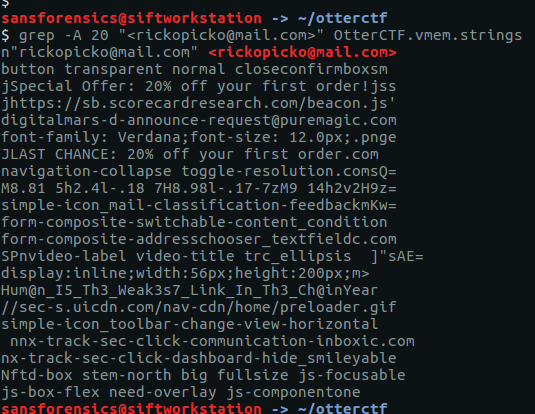
Near the bottom of the output is a curious line of text that looks like our flag, and submitting it as an answer confirms it.
As an alternative method, because we have Rick’s email address and found his password in Question 6, we could try logging into his email account to check. But this is a memory forensics challenge.
CTF{Hum@n_I5_Th3_Weak3s7_Link_In_Th3_Ch@in}
Question 10 – Bit 4 Bit
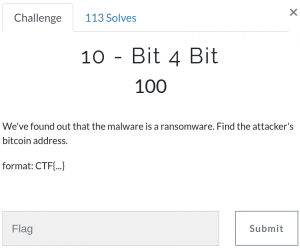
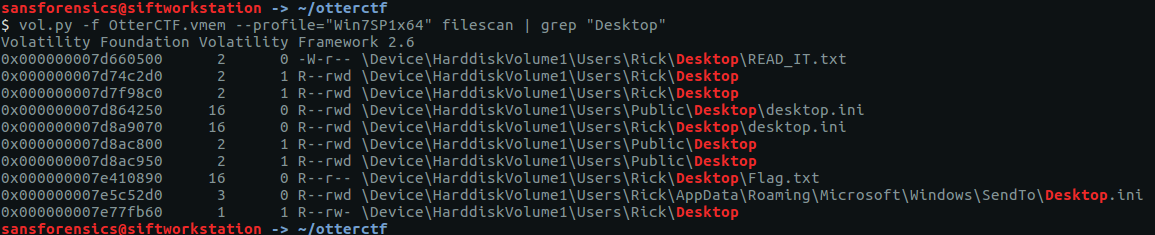
The question tells us that the malware is ransomware of some kind and asks for the associated Bitcoin address. Ransomware tends to drop a ransom note on the Desktop, so let’s look for that first.
vol.py -f OtterCTF.vmem --profile="Win7SP1x64" filescan | grep "Desktop"
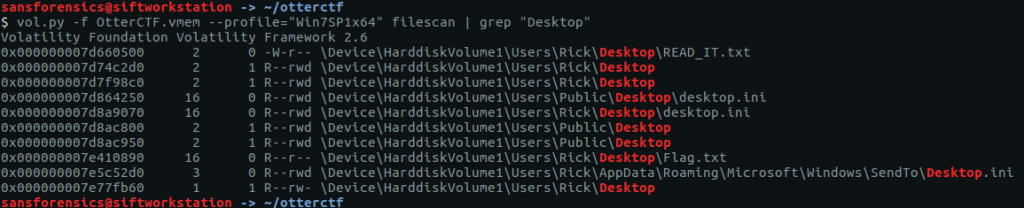
READ_IT.txt looks promising, and flag.txt might be useful to remember later on.
vol.py -f OtterCTF.vmem --profile="Win7SP1x64" dumpfiles -Q 0x000000007d660500 -D .
cat file.None.0xfffffa801b2def10.dat
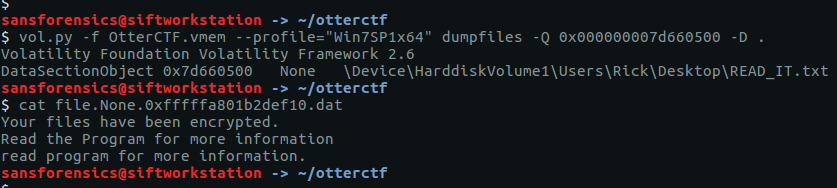
Unfortunately the note only tells us to Read the Program for more information. We identified the ransomware PID in Question 7, so let’s dump the process memory and run strings and grep to search for any mention of “ransom“. Note the slightly different strings command this time; the -e l flag is used to search for Unicode strings.
vol.py -f OtterCTF.vmem --profile="Win7SP1x64" memdump -p 3720 -D .
strings -e l 3720.dmp | grep -i -A 5 "ransom"
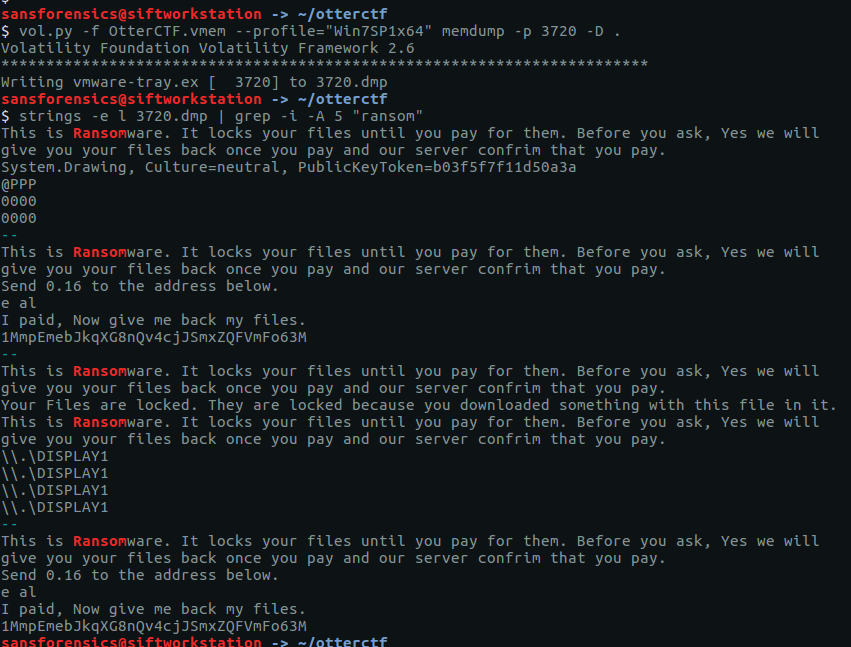
We have found the payment demand, including the price in Bitcoin and the Bitcoin address.
CTF{1MmpEmebJkqXG8nQv4cjJSmxZQFVmFo63M}
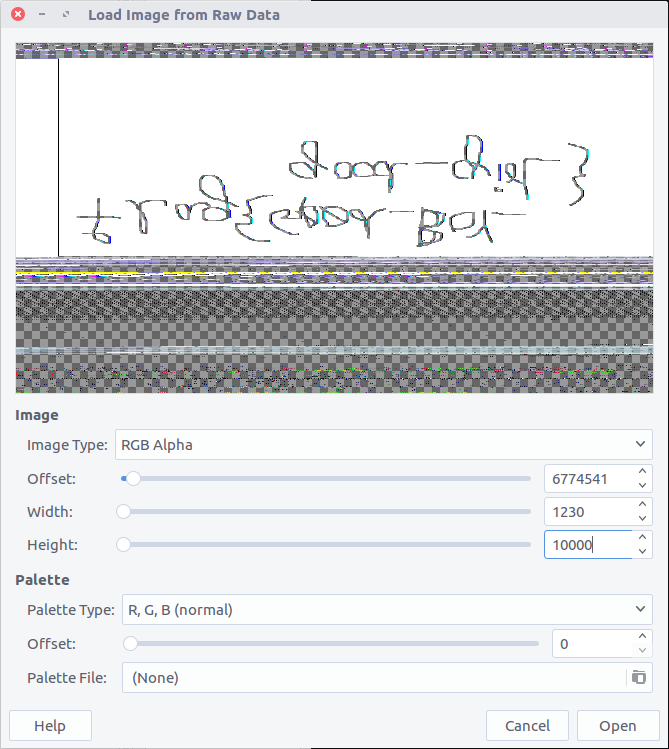
Question 11 – Graphic’s for the Weak
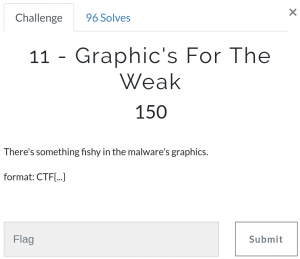
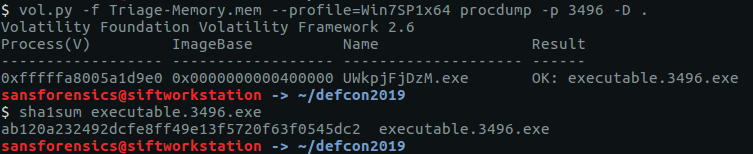
The only hint we have is to examine the malware’s graphics. We can dump the process executable using the procdump plugin, then use binwalk and foremost to identify and carve any graphics from the executable. There’s no real need for binwalk here, I just like to have an idea of what to carve for before running foremost.
vol.py -f OtterCTF.vmem --profile="Win7SP1x64" procdump -p 3720 -D .
binwalk executable.3720.exe
foremost -t png executable.3720.exe
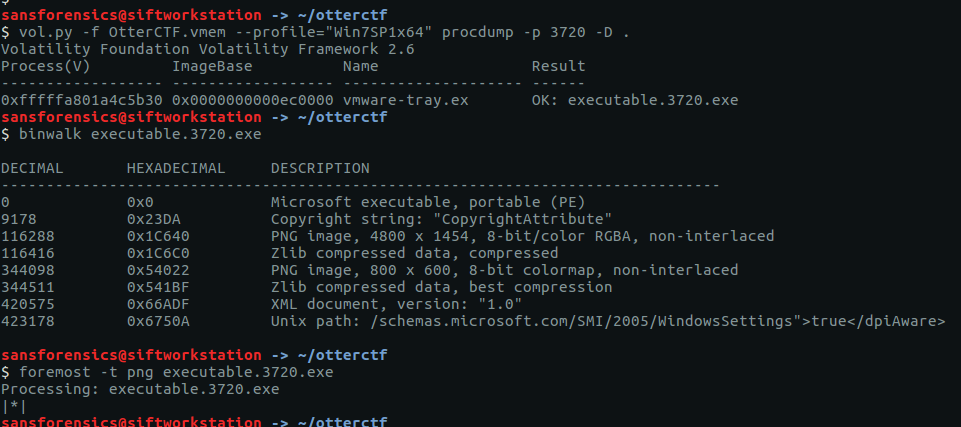
Checking the foremost output, we only have one PNG file but it does contain our flag.

CTF{S0_Just_M0v3_Socy}
Question 12 – Recovery

I expected this question to take a lot of trial and error with grep, so for speed I first extracted the human-readable Unicode strings to a file on disk instead of running strings over the whole memory image for every search. The wc -l command shows 374402 lines; let’s try to reduce that to something more manageable by searching for some of the things we have identified so far.
Searching for “password” didn’t turn up anything useful, and “rick” gave too many hits. Searching for the hostname was more promising, returning 212 hits. By using the sort and uniq commands we can eliminate duplicates and end up with a reasonable list to examine manually.
strings -e l 3720.dmp > 3720.dmp.strings
wc -l 3720.dmp.strings
grep "WIN-LO6FAF3DTFE" 3720.dmp.strings | wc -l
grep "WIN-LO6FAF3DTFE" 3720.dmp.strings | sort | uniq
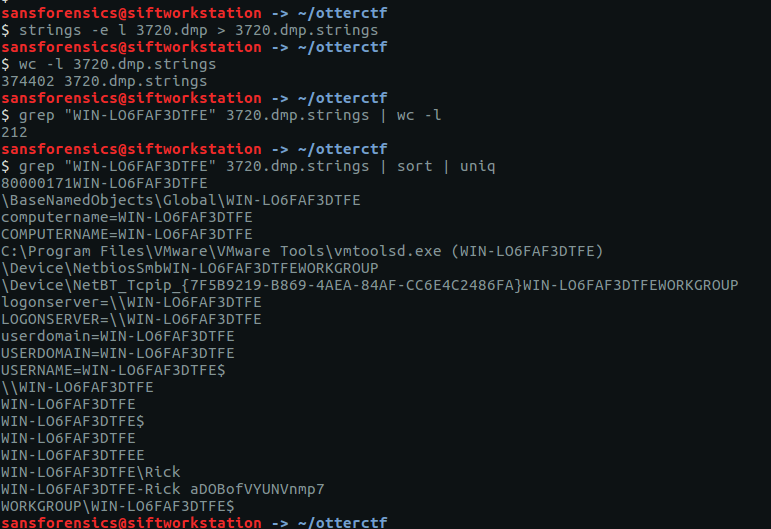
The second last line looks interesting; the hostname and username concatenated together with a seemingly random alpha-numeric string.
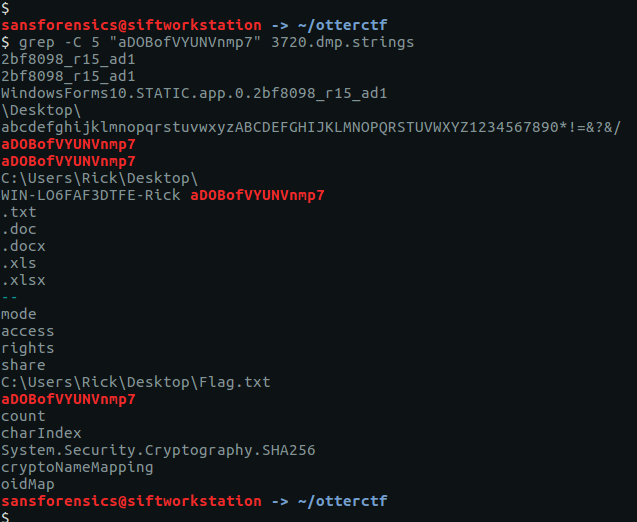
Using grep again we see that this seemingly random string appears multiple times, making it a pretty good candidate for our password.
CTF{aDOBofVYUNVnmp7}
Question 13 – Closure
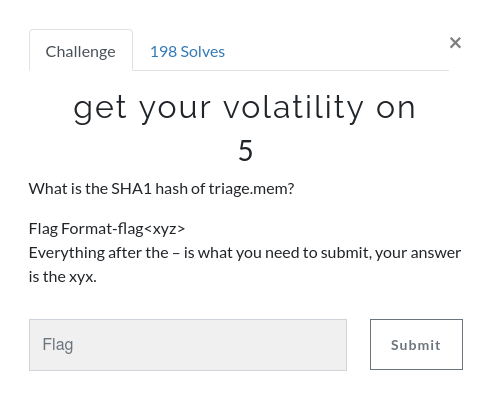
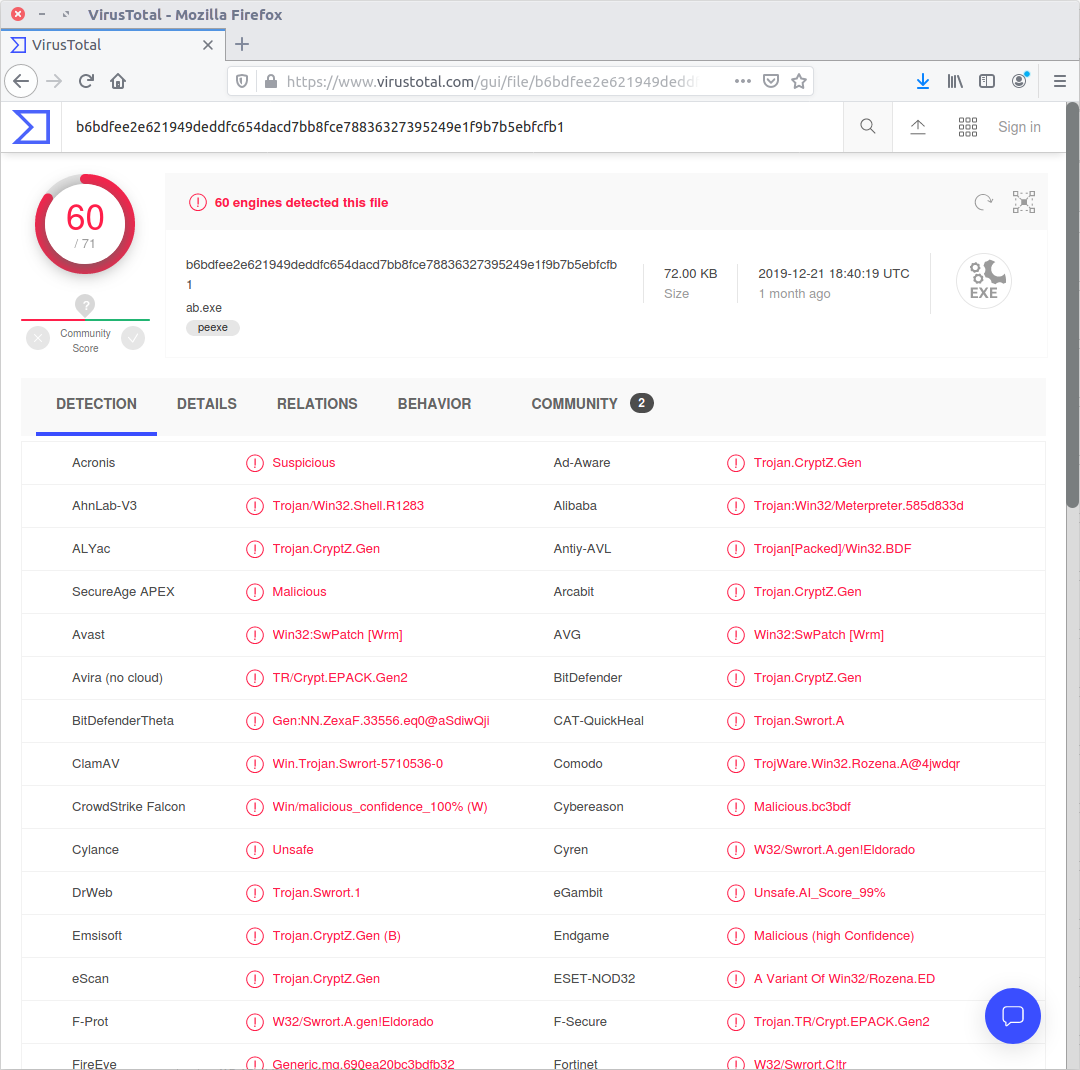
Our final challenge is to use the password from Question 12 to decrypt Rick’s files. First thing we need to find out is the kind of ransomware are we dealing with. We were able to extract the executable from the memory image in Question 11, and it’s possible that someone has already uploaded it to an online sandbox like VirusTotal. Let’s get the SHA1 hash and check.
sha1sum executable.3720.exe

Sure enough, there is a hit on VirusTotal, referencing an alternative executable name (VapeHacksLoader.exe) which is associated with the $ucyLocker ransomware referenced in the graphic we extracted in Question 11. $ucyLocker is a variant of the open-source Hidden Tear ransomware, and with a few Google searches I was able to find a pre-compiled decrypter.
Now we have identified the ransomware and found a decryption utility, let’s extract the file containing the final flag. In Question 10 we saw a file named Flag.txt on Rick’s Desktop.
vol.py -f OtterCTF.vmem --profile="Win7SP1x64" filescan | grep "Flag.txt$"
vol.py -f OtterCTF.vmem --profile="Win7SP1x64" dumpfiles -Q 0x000000007e410890 -D .

After extracting the file from the memory image we can examine it with xxd, which shows a block of 48 seemingly random bytes, followed by null-byte padding.
xxd file.None.0xfffffa801b0532e0.dat

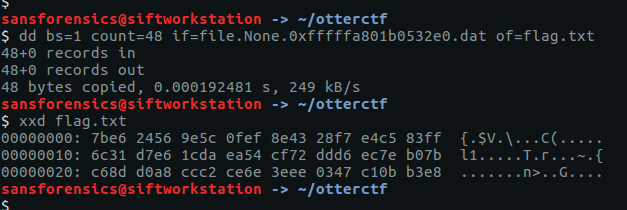
The padding might cause problems for decrypting, so we extract the bytes we want to a new file called flag.txt using dd.
dd bs=1 count=48 if=file.None.0xfffffa801b0532e0.dat of=flag.txt
xxd flag.txt
As the decryptor would only run on Windows, and because I didn’t entirely trust a pre-compiled decryptor downloaded from the internet, I spun up a Windows 7 VM and copied flag.txt to the Desktop.
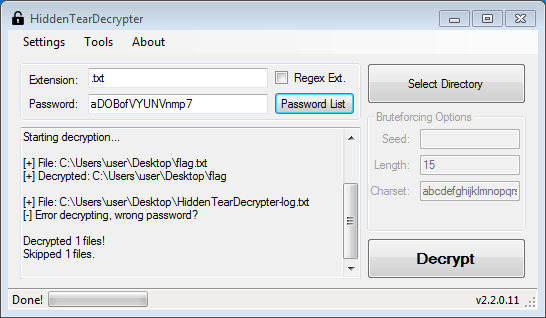
After specifying the file extension and supplying the password we extracted in Question 12, the tool ran and output a plaintext file named flag (the file extension having been stripped during decryption).
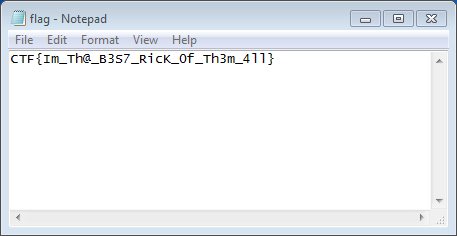
Opening the newly decrypted flag file gives us our final flag, and completes the memory forensics portion of the CTF.
CTF{Im_Th@_B3S7_RicK_0f_Th3m_4ll}